
Seeing a check engine light after an oil change is usually caused by a loose oil filler cap, an improperly seated dipstick, an overfilled oil pan, or a sensor that was accidentally bumped during the service. In many cases, drivers also confuse the routine “Maintenance Required” light with the actual check engine light. To fix it, verify your oil cap is tight, check the oil levels, and use an OBD-II scanner to read the code or reset the system.
Table of Contents
ToggleThe Frustration of Post-Service Dashboard Lights
You just did the responsible thing as a car owner: you took your vehicle in for its routine maintenance. You paid for premium synthetic oil, got a new filter, and drove off the lot feeling good about extending the life of your engine. But then, a few miles down the road, perhaps while cruising down Houston’s I-10 or Beltway 8, you look down at your dashboard and see it. The dreaded orange glow.
Experiencing a check engine light after an oil change is incredibly frustrating. Your immediate thought is likely, “Did the mechanic break something?” or “Is my engine going to blow up?” Fortunately, in the vast majority of cases in 2026, this warning light is triggered by a minor oversight rather than a catastrophic engine failure. Modern vehicles are equipped with highly sensitive Engine Control Units (ECUs) and an array of sensors that monitor everything from fluid pressure to emissions. Even the slightest deviation during a routine oil change can trigger a warning.
In this comprehensive 2000-word guide, we will explore exactly why your check engine light is on after an oil change, the critical differences between warning lights, and step-by-step instructions on how to reset check engine light after oil change protocols so you can get back on the road with peace of mind.
The Big Mix-Up: Maintenance Light vs. Check Engine Light
Before we dive into engine diagnostics, we need to address the most common mistake vehicle owners make. Are you sure it is the Check Engine Light (CEL)?
Many modern cars have a separate light dedicated strictly to oil changes and routine service.
- Maintenance Required Light (Maint Reqd): This light is strictly a mileage counter. If it pops on as soon as you leave the lube shop, it simply means the technician forgot to reset the mileage counter after performing the oil change. It often looks like a wrench, or literally says “Oil Change Required.”
- Oil Pressure Light: This looks like an old-fashioned oil can with a drop coming out of it. If this light comes on, pull over immediately. This means your engine has lost oil pressure (perhaps the technician forgot to put oil back in, or the drain plug fell out). Driving with this light on will destroy your engine in minutes.
- Check Engine Light (CEL): This looks like the outline of a car engine. It monitors emissions, sensors, and engine performance. If this is the light you see, continue reading.
Why Is My Check Engine Light On After Oil Change? (Top Causes)
If you are wondering, “Why is my check engine light on after an oil change?” you are not alone. Here are the most common reasons why this happens, ranging from simple fixes to more complex sensor issues.
A. The Oil Filler Cap or Dipstick is Loose
This is the number one reason for a check engine light immediately following a fluid service. Your car’s engine operates under a strict vacuum pressure system to control emissions (known as the EVAP system). If the technician checked your oil and didn’t push the dipstick all the way back down, or if they forgot to twist the oil filler cap until it clicked, the engine will detect a vacuum leak.
- The Fix: Pull over safely, pop your hood, and ensure the oil filler cap is screwed on tight and the dipstick is fully seated.
B. Too Much Oil (Overfilling)
Engines require a very specific amount of oil. If a shop puts 6 quarts of oil into an engine that only requires 4.5 quarts, the excess oil can whip into a foam due to the spinning of the crankshaft. Foamy oil cannot properly lubricate the engine or maintain hydraulic pressure. Furthermore, excess oil can be pushed into the PCV (Positive Crankcase Ventilation) valve, sending oil into the air intake. This will foul your spark plugs and MAF sensor, immediately triggering the check engine light.
C. Wrong Oil Viscosity
Modern engines, especially those with Variable Valve Timing (VVT), rely heavily on oil pressure to advance or retard engine timing. If your car requires 0W-20 synthetic oil, and the shop accidentally used a thicker 10W-40 conventional oil, the VVT solenoids will not operate correctly. The car’s computer will notice that the camshaft timing is off and will illuminate the check engine light.
D. Accidental Sensor Disconnection
Engine bays in 2026 are incredibly cramped. The oil filter is often located deep in the engine bay, surrounded by delicate wiring harnesses and sensors. When a mechanic reaches down with an oil filter wrench, it is very easy for their hand or tool to bump and disconnect a sensor. Common victims include:
- Mass Air Flow (MAF) Sensor: Often located near the air filter box (which is usually checked during a full-service oil change).
- Oxygen (O2) Sensors: Located on the exhaust manifold near the oil filter on many 4-cylinder engines.
- Camshaft Position Sensor: Often located near the top of the valve cover.
E. The Air Filter Box Was Left Open
During a “premium” oil change, technicians will often open your air filter box to check if you need a new engine air filter. If they fail to clip the box back together tightly or if they rip the intake hose, unmetered air will rush into the engine. The MAF sensor will read one amount of air, but the engine will receive another. This creates a “lean” condition, immediately throwing a Check Engine Light.
How to Reset Check Engine Light After Oil Change (Step-by-Step)
If you have verified that your oil cap is tight, your dipstick is secure, and your engine is not making any weird noises, you might want to clear the light. People frequently search for how to turn off check engine light after oil change. Here are the safest and most effective methods.
Method 1: Use an OBD-II Scanner (The Safest Way)
The most responsible way to address any dashboard light is to know exactly what is causing it.
- Plug in the Scanner: Locate the OBD-II port under your steering wheel dashboard and plug in the scanner.
- Turn the Key to “On”: Do not start the engine; just turn on the electronics.
- Read the Code: Let the scanner link to your ECU. It will spit out a code (e.g., P0455 for an EVAP leak, which means a loose cap).
- Erase the Code: Press the “Clear” or “Erase” button on the scanner. If the underlying issue (like a loose cap) was fixed, the light will stay off. If the issue is still present, the light will return within 50 miles.
Method 2: The Battery Disconnect (The “Old School” Reset)
If you don’t have a scanner and are wondering how to get check engine light off after oil change using tools at home, the battery method works for many vehicles (though it resets your clock and radio presets too).
- Turn Off the Car: Ensure the keys are out of the ignition.
- Disconnect the Negative Terminal: Open the hood and use a wrench to disconnect the negative (-) battery cable (usually the black one).
- Wait 15 Minutes: Leave it disconnected for 15 to 20 minutes to drain the residual power from the ECU’s capacitors. (Some mechanics recommend pressing the horn for 30 seconds to drain the power faster).
- Reconnect: Put the terminal back on and tighten it.
- Start the Car: The light should be gone.
Method 3: The Drive Cycle Reset
Sometimes, if the mechanic fixed a minor issue (like tightening a loose cap before you drove away, but the light had already triggered), the car just needs time to realize the problem is gone. Most cars will clear their own check engine light after 3 to 5 “drive cycles.” A drive cycle consists of starting the car cold, driving it until it reaches operating temperature, and letting it cool down completely. If the computer runs its self-tests and finds no errors, it will turn the light off automatically.
Resetting the “Maintenance Required” Light
As mentioned earlier, if you are actually looking at a “Maintenance Required” light rather than a Check Engine Light, disconnecting the battery won’t work. The maintenance light must be reset via the dashboard cluster.
While every car is different, here is the general process for most Toyota, Honda, and Ford vehicles:
- Turn the ignition to the “ON” position (do not start the engine).
- Ensure your odometer is set to “Trip A” or total mileage (varies by brand).
- Turn the ignition off.
- Press and hold the “Trip/Reset” button on the dashboard.
- While holding the button, turn the ignition back to the “ON” position.
- Keep holding the button until the maintenance light flashes and then turns off, or the odometer displays “000000”.
If you are trying to figure out how to turn check engine light off after oil change, always verify first if it’s actually just the oil life monitor reminding you of the service you just had!
What If the Car Is Running Rough? (When to Stop Driving)
While a loose gas or oil cap is harmless, other issues caused during an oil change can be catastrophic. You must evaluate how the car feels.
Do Not Drive If:
- The check engine light is flashing (This indicates a severe misfire).
- The engine is shaking violently.
- You hear a loud knocking or ticking sound from the engine (This means the engine is starving for oil).
- You see smoke coming from under the hood.
If any of these symptoms accompany your dashboard warning, pull over immediately. Driving even one extra mile with no oil pressure or a severe misfire can turn a simple fix into a $5,000 engine replacement.
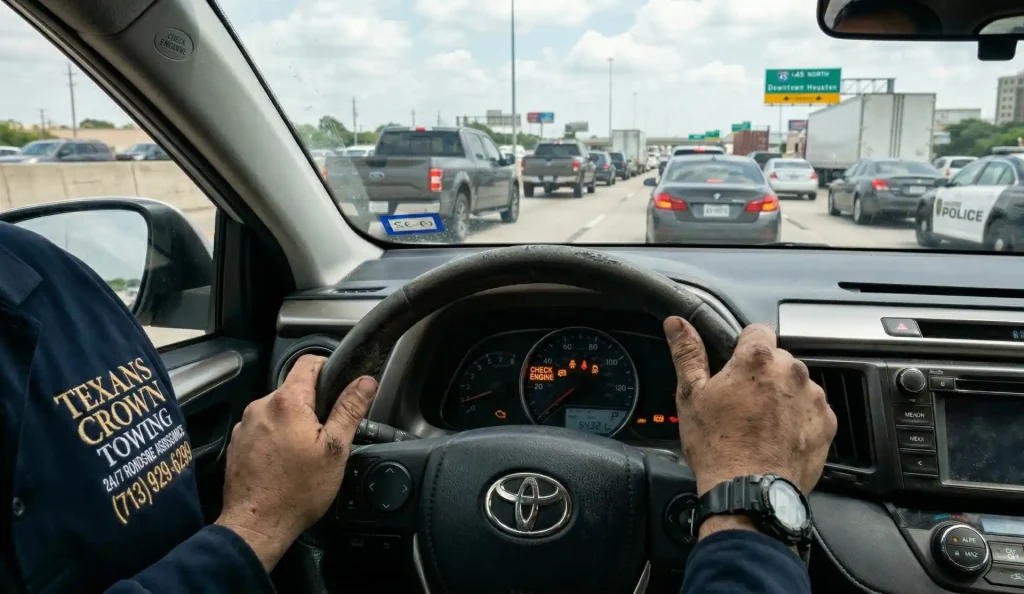
Call Texans Crown Towing for Safe Transport
If your car starts failing after a botched oil change, do not risk driving it back to the lube shop. Secure your vehicle and call for a professional tow truck in Houston. At Texans Crown Towing, we provide 24/7 roadside assistance and flatbed towing across the greater Houston area. We can safely transport your vehicle to a certified mechanic who can properly diagnose the shop’s mistake without causing further damage to your drivetrain. Call us immediately at (713) 929-6299.
Frequently Asked Questions
Why is my check engine light on after oil change?
The most frequent cause is human error during the service. A mechanic may have left the oil filler cap loose, failed to push the dipstick all the way down, bumped and disconnected an engine sensor (like the MAF or O2 sensor), or overfilled the engine oil. It can also happen if the air intake hose was improperly reinstalled after checking the engine air filter.
How to reset check engine light after oil change?
The best way to reset the light is to use an OBD-II diagnostic scanner to read and clear the code. If you do not have a scanner, you can open the hood, disconnect the negative (black) battery terminal for about 15 minutes, and then reconnect it. This will reset the Engine Control Unit (ECU) and turn the light off. However, if the underlying mechanical issue hasn’t been fixed, the light will come back on.
How to turn off check engine light after oil change?
First, perform a visual inspection under the hood. Ensure the oil cap is tight, the dipstick is secure, and no wires are visibly hanging loose near the oil filter. Once you have verified everything is secure, you can use a code reader to turn off the light, or drive the car for 3 to 5 full “drive cycles.” If the car’s computer detects that the issue is resolved, it will turn the light off on its own.
How to get check engine light off after oil change without a scanner?
Without a scanner, you can use the battery disconnect method. Remove the negative battery cable for 15-20 minutes to drain the system’s memory. Another option is simply driving the vehicle for a few days; if the issue was a temporary vacuum leak caused by an open oil cap that you have since tightened, the ECU will eventually clear the code automatically after completing its internal self-tests.
How to turn check engine light off after oil change (if it’s just the maintenance light)?
If the light says “Maint Reqd” or shows a wrench icon, it is an oil life reminder, not an engine fault. To turn this off, you generally need to use your steering wheel controls or dashboard trip button. Hold down the trip reset button while turning the car’s ignition to the “ON” position (without starting the engine) and wait for the light to blink and reset. Check your specific vehicle’s owner’s manual for the exact sequence.
Conclusion
Seeing a warning light right after spending money on vehicle maintenance is stressful, but it shouldn’t cause you to panic. By understanding the difference between your vehicle’s maintenance reminders and actual engine faults, you can save yourself a lot of anxiety.
Always start with the simplest solutions: pop the hood, check the oil cap, push down the dipstick, and make sure the air filter box is closed tight. If you know how to reset check engine light after oil change using a scanner or the battery method, you can quickly determine if the issue was a temporary glitch or a persistent problem.
However, if your car is running rough, making alarming noises, or leaking oil, do not attempt to drive it. Protecting your engine is the top priority.
Need a tow in Houston? If your post-oil change experience has left your car undrivable, don’t take any chances. Contact Texans Crown Towing at (713) 929-6299 or visit texanscrowntowing.com. Our expert operators are on standby 24/7 to safely transport your vehicle to a trusted professional.